Homemade peanut butter cups are simple to make and even more delicious than storebought versions. Simply melt chocolate and pour it into a mold. Mix peanut butter with powdered peanuts, dollop into the molds and cover with more chocolate. Let them set and then enjoy!
Why Homemade?
As eggs, hearts or Santas, peanut butter cups fill an important role in every holiday candy bowl. My personal favorite was always the toy soldiers. They were the fanciest peanut butter cups we ordered out of a catalog around Christmas time.
I learned over the years that many of those had way too much added sugar and a whole lot of extra oils that just aren't really necessary, and to be honest, don't taste as good anymore in my adulthood. That lead me to create healthier homemade peanut butter cups!
Why this Healthier Peanut Butter Cups Recipe Works
High-Quality Ingredients
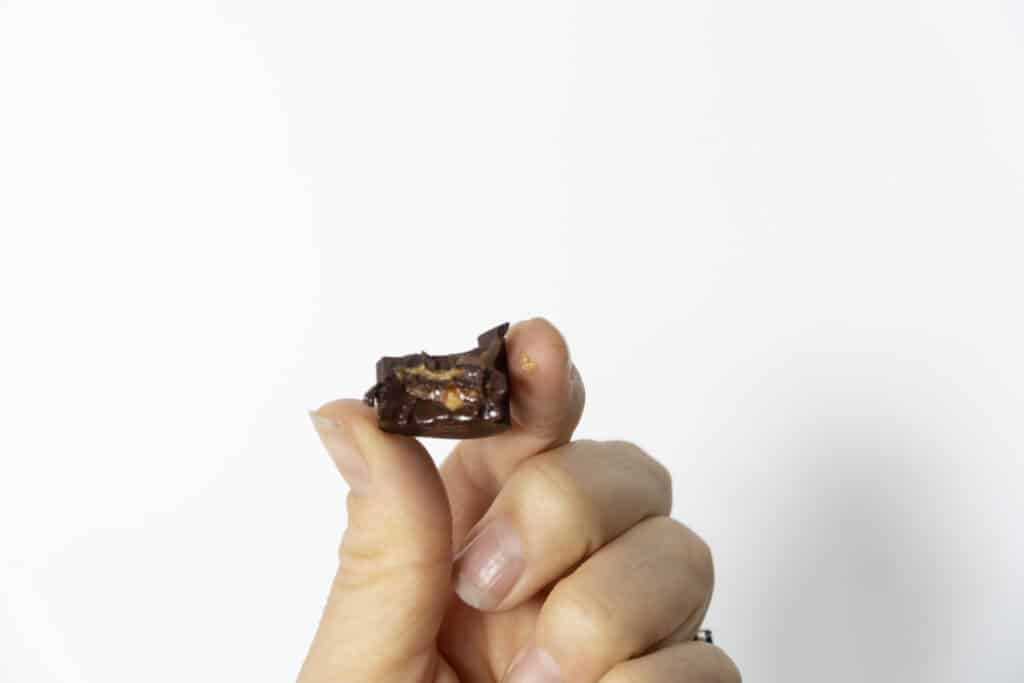
These homemade PB cups have simple real food ingredients and are surprisingly quite simple to make. Dark chocolate gives a richer taste and cuts the sugar content.
Powdered peanut adds firmness and solidity to the peanut butter filling. The only ingredients are peanuts, but the fact that they are dehydrated makes the filling more solid and less gooey.
These homemade peanut butter cups are free of refined sugars and oils. They are all-around a healthier treat because you get to choose and control the ingredients!
Simplicity
The whole process takes about 35-45 minutes, including the time to set the cups. Skip your grandma's double boiler and melt the chocolate squares directly in a saucepan on low heat. Trust me, it will be fine and not even discolored.
The rest of the recipe involves melting, mixing, pouring, and waiting.
With peanut butter, make sure to find one with only peanuts and maybe a dash of salt in the ingredients list. Extra oils and sugar are not necessary for peanut butter!
These are ingredients I always have in my pantry so I can make them anytime!
Choosing your Dark Chocolate
We chose dark chocolate for 2 reasons: taste preference and nutrition. I just think dark chocolate is the best chocolate.
Additionally, 85% or higher dark chocolate means it is made mostly of cacao beans which have some nutritional benefits. This type of dark chocolate also has fewer fillers like sugar, milk, and oils.
Peanut butter is naturally oily. The peanut butter powder helps to firm it up. You can omit the peanut butter powder but the plain peanut butter filling will be drippy, making it harder to get a solid chocolate layer around the edges. It will also be harder to eat!
The peanut butter powder on its own mixed with water will not taste like peanut butter. It is missing all of those nice oils.
That's why you need both for the optimal results!
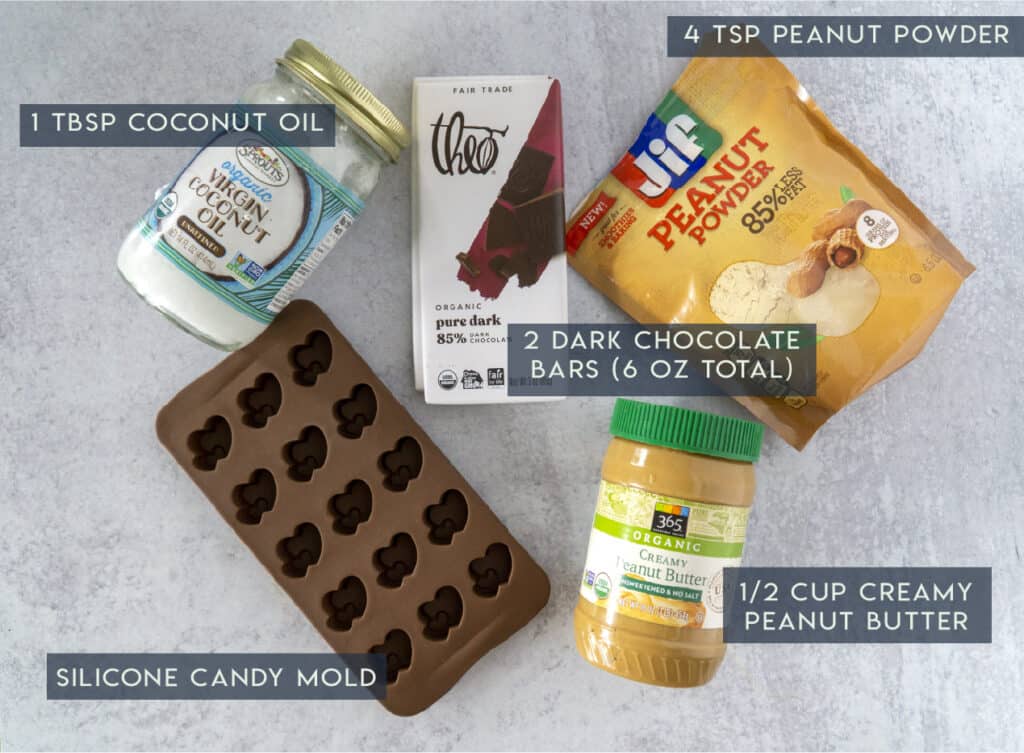
What you'll Need
Besides the ingredients, you'll need a stovetop, a saucepan, and silicone molds.
Silicone Candy and Chocolate Molds
This recipe creates 15 mini cups and 3 large cups, though the specific quantity will decide on your specific molds and their size.
The important part of picking chocolate or candy molds is to choose ones that have food-grade silicone. Then you can choose any shape you want!
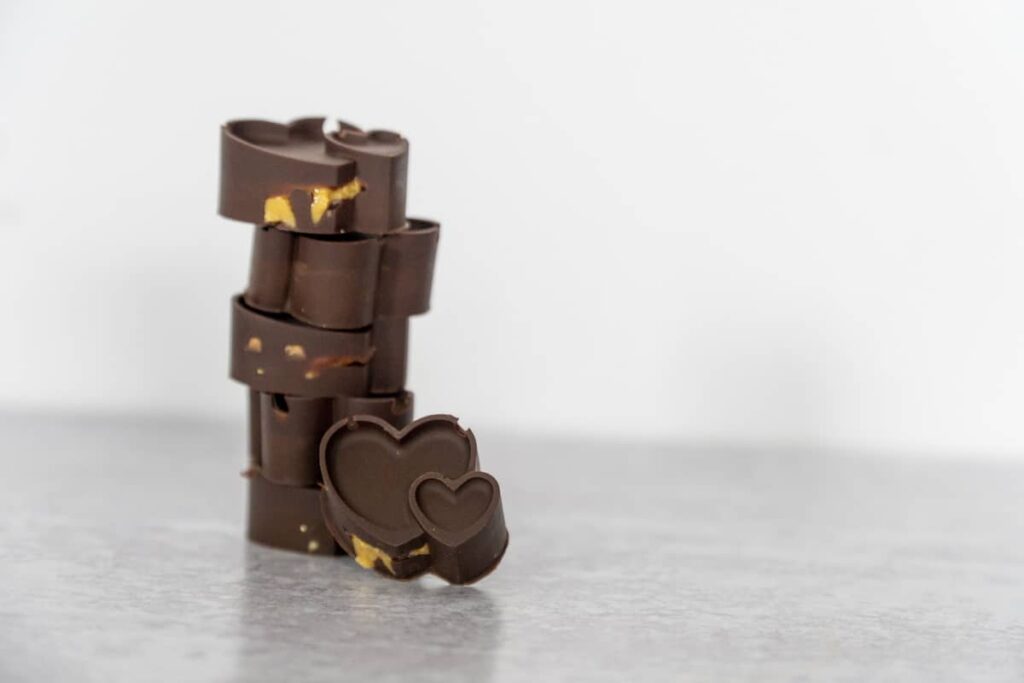
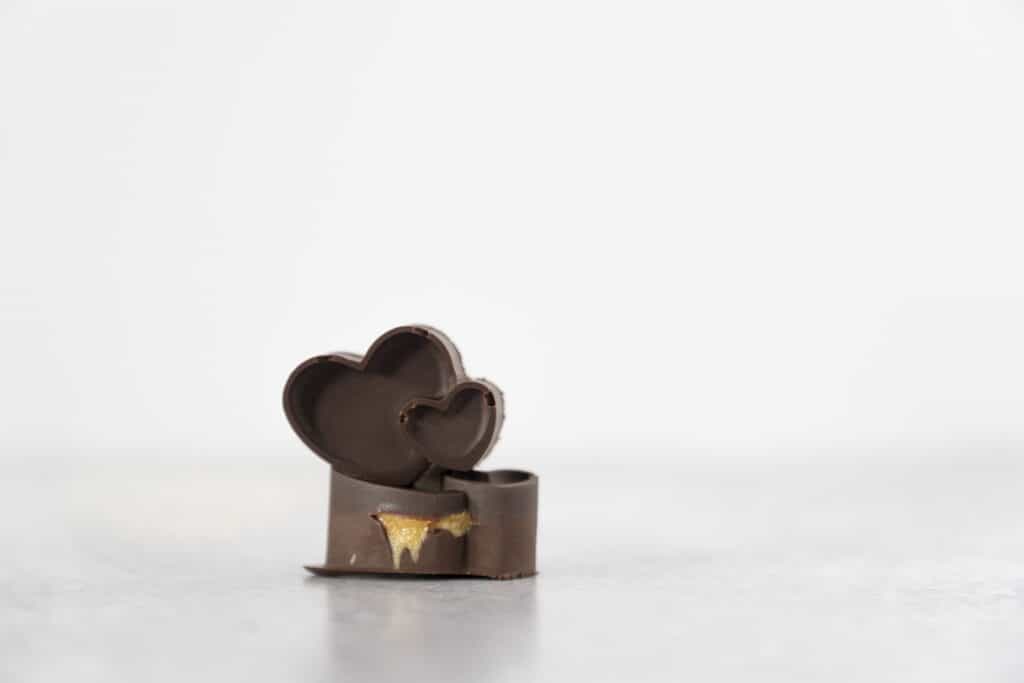
The Heart Molds
These peanut butter cups are hearts, but the beauty of making them at home is that you can use any mold you have, any time of the year, to make whatever shape you want.
I used these double heart molds for the mini peanut butter cups hearts featured in this recipe along with my all-time favorite sun molds for extra-large PB cups. These are the same molds I use for my mini Moringa Cheesecakes.
Most recipes will tell you to melt chocolate in a double boiler. The idea here is that you will have smaller amounts of dispersed heat and avoid discoloring. If chocolate gets too hot too quickly, it will discolor and leave white streaks. This is basically the cacao butter separating from the cacao liquor. It can also mess up the texture.
However, double boiling takes a long time and requires more dishes. It is just generally a deterrent to making homemade chocolates and I think an unnecessary one.
By all means, if you are a competent double boiler and you have the skills, double boil the chocolate before pouring into the molds! However, if you want a quick and dirty option, here are two.
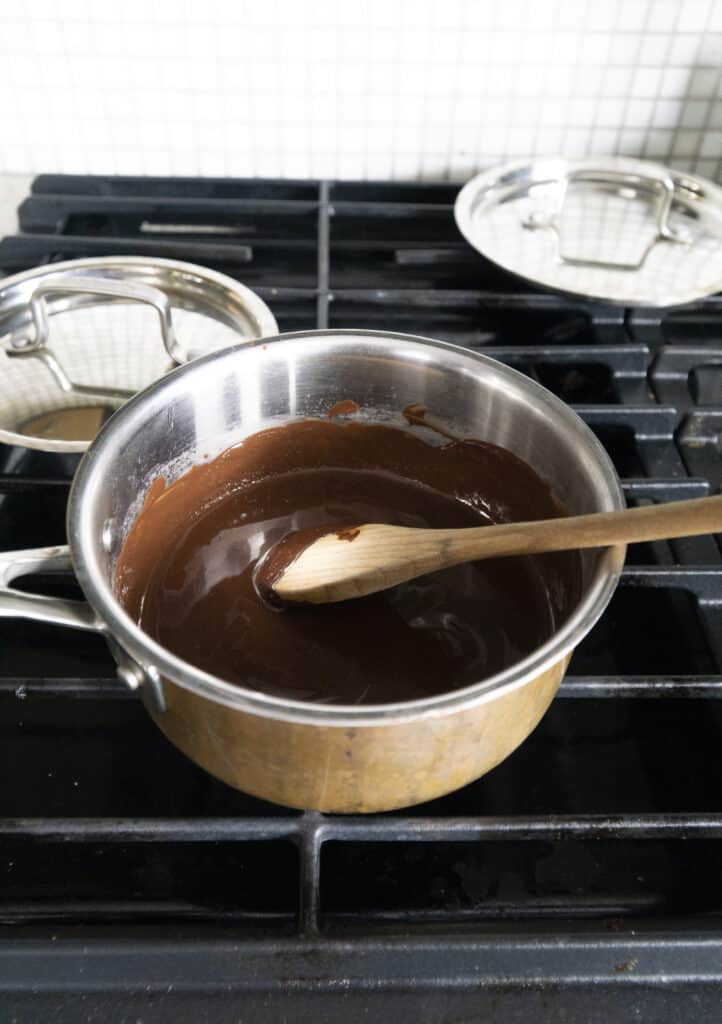
Option 1 (what I do): Melt on low heat on the stovetop
Simply put broken chocolate squares into a small saucepan on low heat and stir with a wooded spoon occasionally. The chocolate will melt and the stirring will prevent burning.
This is my favorite method because it doesn't use the microwave and only uses one pan.
Option 2: Microwave
I avoid the microwave for most things, which is why i prefer to melt the chocolate directly on the stove as mentioned above. However, this is a quick and easy method that works.
The key is to heat the chocolate in 20-30 second increments and then stir in between until just melted. There should be small chips of unmelted chocolate after the last session of the microwave. Use a spoon to mix the chocolate and the warm chocolate will melt the remaining pieces of hard chocolate.
In other words, avoid microwaving the chocolate until it is fully melted. Instead, use stirring to spread the heat evenly. This will prevent burning.
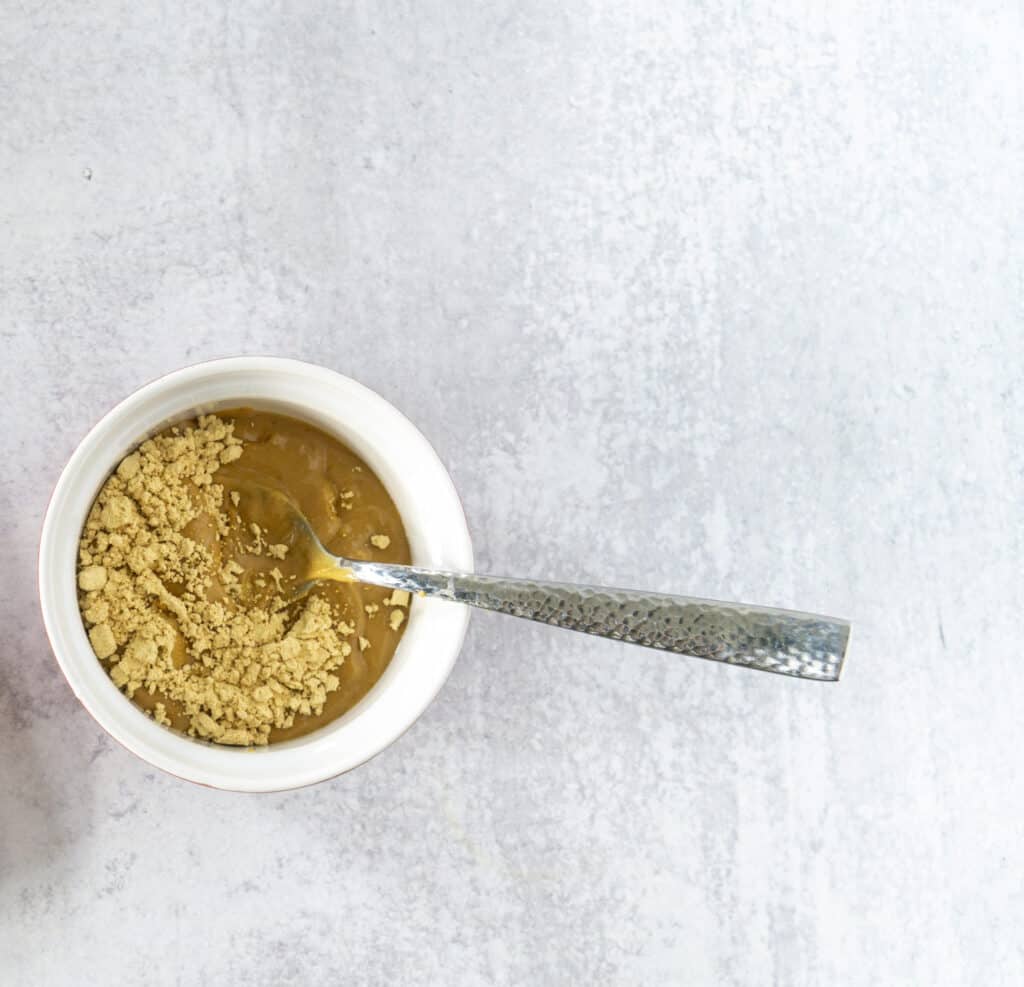
Mix the Peanut Butter and Powdered Peanut Butter
This step is simple.
Just pour the peanut butter into a small bowl and stir in the powdered peanut butter.
Fill the Molds
There are three layers in the cups and therefore three steps in filling the molds
Layer of chocolate
Small ball of peanut butter mix
Top coast of chocolate, making the top and filling in the sides
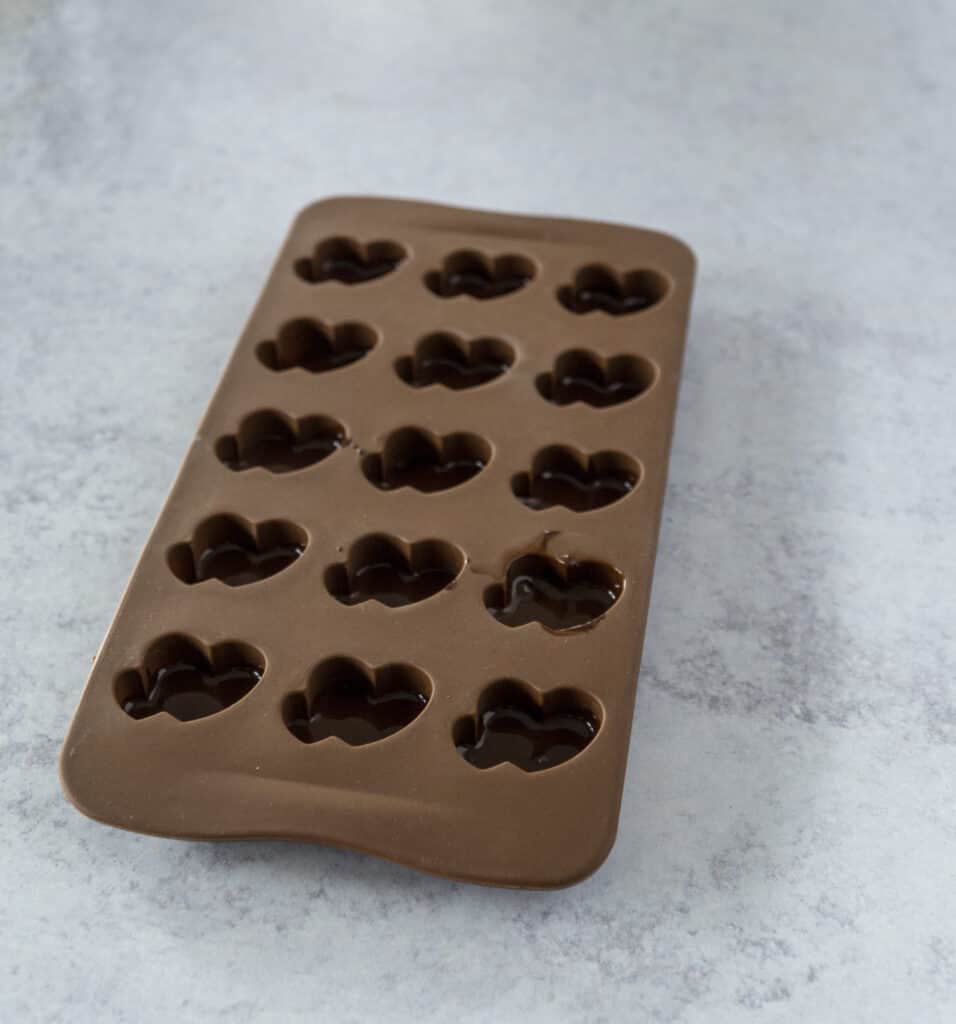
First Chocolate Layer
After pouring a layer of chocolate into the molds, make sure that the full bottom is coated and spread evenly. Slightly tapping the molds against the countertop will help evenly distribute the chocolate and also remove any air bubbles. This is just gently lifting the entire mold or a corner of the mold about an inch off the table and letting it fall back to the table.
The first layer of chocolate needs to be a little thicker. This creates stability for when you are removing the chocolates from the mold.
When removing the hardened chocolates, you push the chocolate up from the bottom. I've found that a slightly thicker chocolate layer on the bottom helps to keep the full candy intact.
Put the molds in the fridge for about 3-5 minutes so that the first layer of chocolate is set before adding the peanut butter. This makes sure you have a solid layer of chocolate before getting to the peanut butter.
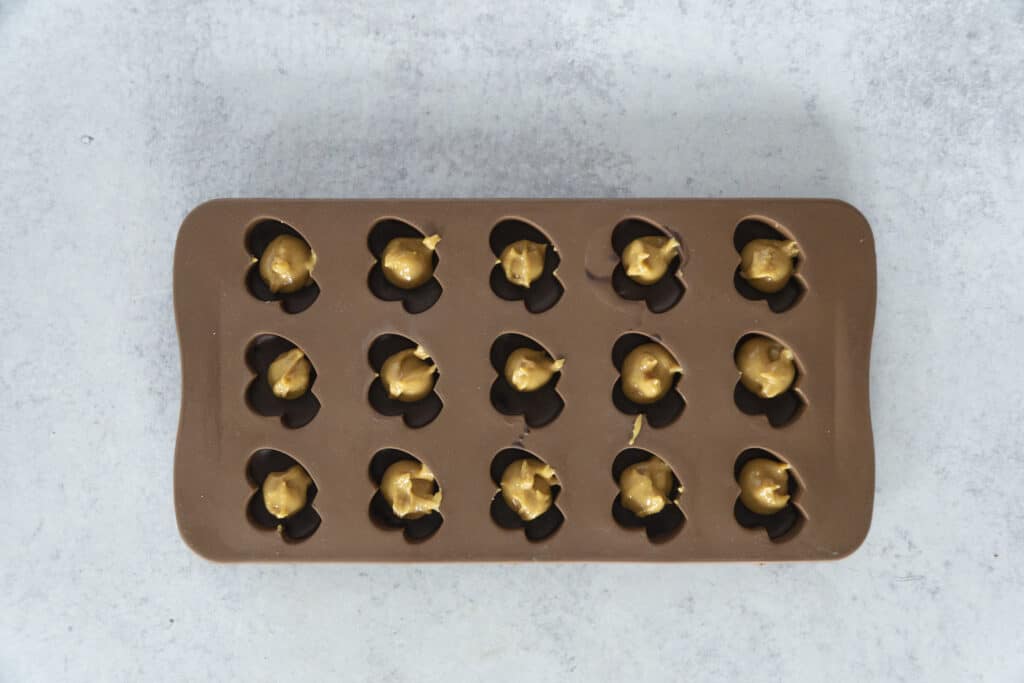
Peanut Butter Center
Add a small ball of peanut butter on top of the first layer of set chocolate. You want to add a ball instead of a solid layer so that the top layer of chocolate can fill in the edges and create a full cup of chocolate leaving the peanut butter just in the center.
I used a knife to pull a small dollop of peanut butter mixture into the center of the individual molds.
Lay the molds flat in the freezer for about 5 minutes to harden the peanut butter. This is to protect the peanut butter from melting into the top layer of chocolate.
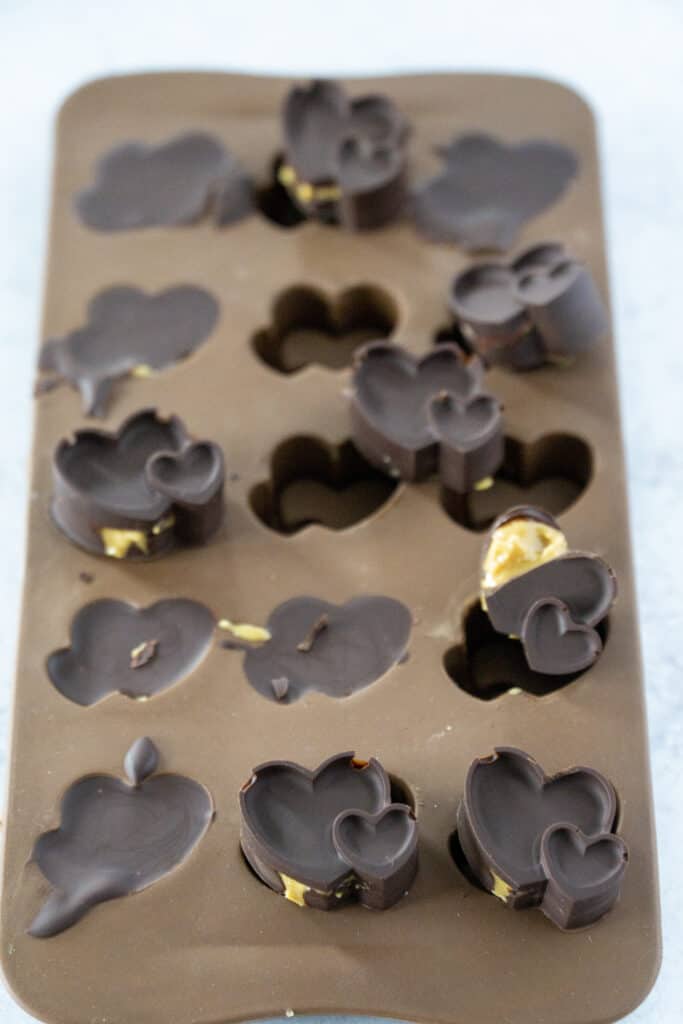
Final Chocolate Layer
The last layer of chocolate will create the bottom of the cup as well as the sides. You may need to lightly reheat the chocolate so that it is warm and liquidy enough to gently slide into the spaces between the peanut butter balls and the edge of the mold.
Pour the chocolate on top of the molds. For mini molds, the chocolate should fall easily into the sides. For large molds, consider drizzling chocolate around the edges first and then coating then covering the remainder of the mold up with chocolate.
Fill the mold to the top and then refrigerate the completed molds fro another 5-7 minutes or until fully set.
Expert Tips for Homemade Chocolate Peanut Butter Cups
Stir the chocolate often and heat on low heat to prevent burning and discoloration
Create a thicker layer on the bottom of the molds for more stability and easier removal
Don't get the chocolate too hot. It should be just warm enough to pour into the molds. Chocolate burns easily and too hot of liquids can cause chemicals to leech out of the silicone molds.
For thinner chocolate layers, add additional coconut oil to thin the chocolate
The peanut butter powder is what firms up the center. If you want it firmer, add more. If you want a more gooey and drippy filling, add less.
You can make these almond butter cups using almond flour and almond butter instead.
Healthy and easy homemade peanut butter cups with alternating layers of dark chococalte with coconut oil and peanut butter with powdered peanuts.
Ingredients
23 oz bars dark chocolate (3 oz bars) (I used Theos 85% dark chocolate)
1tbsp coconut oil
4tsp peanut butter powder
1/2cup peanut butter
Instructions
1
Melt the chocolate with coconut oil in stovetop on low heat, stirring often with wooden spoon.
2
Mix peanut butter and peanut butter powder
3
Pour a layer of chocolate into molds, making sure to cover the bottoms. Tap to remove air bubbles. Let set in the fridge for 3-5 minutes. Remove chocolate from heat.
4
Dollop ball of peanut mixture on top of chococlat, making sure not to touch the edges of mold and leaving space for a layer of chocolate on top. Let set in freeer for 5 minutes.
5
Pour chocolate over tops of mold, covering sides and top of peanut butter. Tap to remove air bubbles. Let sit for 10 minutes or until set.
Nutrition Facts
Servings 18
Amount Per Serving
Calories108kcal
% Daily Value *
Total Fat8g13%
Saturated Fat4g20%
Cholesterol1mg1%
Sodium40mg2%
Potassium114mg4%
Total Carbohydrate6g2%
Dietary Fiber2g8%
Sugars3g
Protein3g6%
Vitamin A 4 IU
Calcium 10 mg
Iron 1 mg
* This nutrition information does not tell the whole story of food's nutritional value! Make sure to use your gut intuition on what your body needs, eat your veggies and get 30 plants a week for optimal gut health. This nutritional data is calculated based on the above values and standard brands. This information may vary. Percent Daily Values are based on a 2,000-calorie diet. Your daily value may be higher or lower depending on your calorie needs. Tried this Recipe? Tag me Today! Mention @EatYourWayClean or tag #EatYourWayClean!
Note
Don't let chocolate overheat. This can cause burning and leach chemicals from the silicone molds.
You can use sustainable palm oil or cacao butter instead of coconut oil
A slightly thicker layer of chocolate on the bottoms of the mold will make the chocolates easier to remove.
The peanut butter powder is what firms up the center. If you want it firmer, add more. If you want a more gooey and drippy filling, add less.
Keywords:
chocolate and peanut butter cups, healthier peanut butter cups, peanut butter cup recipe