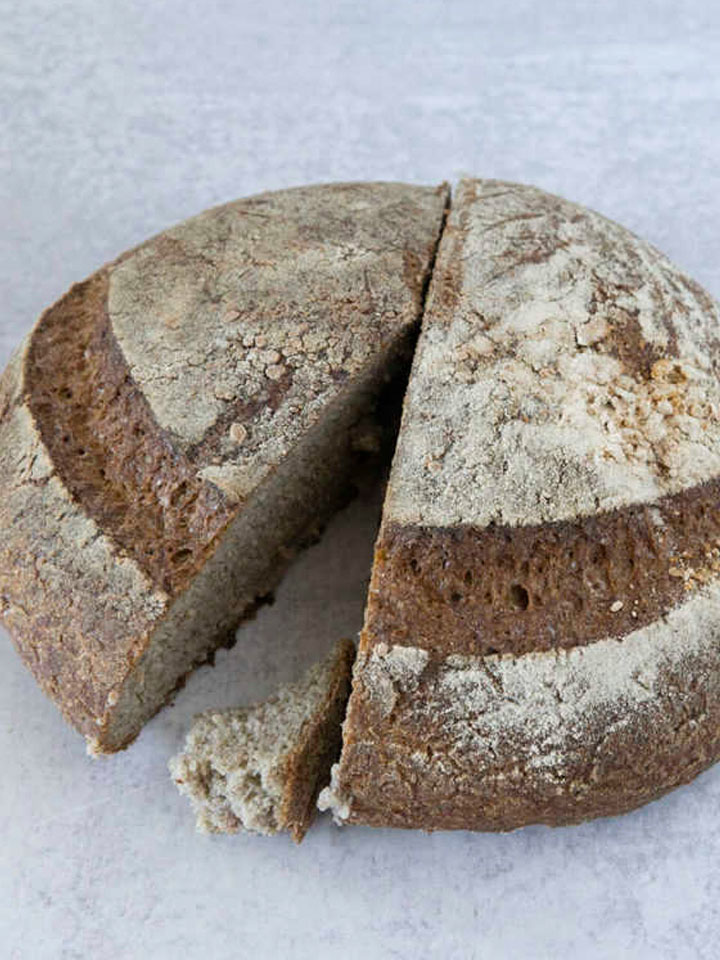
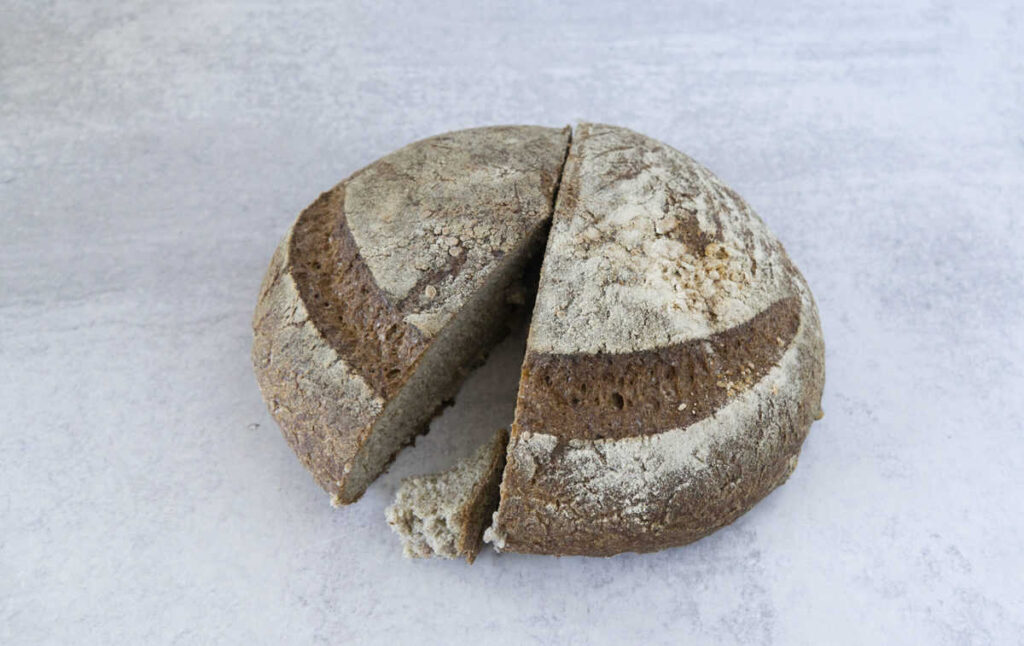
Traditional sourdough made completely gluten-free with reduced starter feedings and no scale! Try homemade gluten free sourdough bread with this simple 3-day recipe.
Sourdough is all the rage in 2020 but what if you could make it gluten-free and without feeding a starter forever? Well, that's exactly what this recipe does. This 3-day starter with limited feeding that doesn't require a scale even creates a final sourdough bread loaf without kneading!
This bread recipe goes from start to finish with traditional healthy methods just a little bit faster without losing any of the nutritional or taste benefits. We'll make the starter, proof the dough, and then bake the final product.
I'll take you through 3 key steps
Making the starter
Preparing the dough
Baking the sourdough loaf
Why this recipe works
While this is a shortcut, it also makes for better gluten-free bread in my experience.
Being gluten-free actually makes this easier to make because it doesn't require any kneading like gluten-filled bread and the starter seems to be ready quicker, too!
The Rapid Gluten-Free Sourdough Starter
This starter is quick because I've found that it works better this way!
After multiple times trying gluten-free starters with different ratios, flours, and durations, I find that a starter with brown rice flour works best and has the most activity early on in the process. After multiple feedings, gluten-free sourdough starters can get less bubbly aka active which can lead to flatter, duller bread.
And to be honest, it doesn't matter how long the starter is alive. It matters how active it is! That will show up in the final product by how bubbly it makes your bread and how it breaks down sometimes hard to digest proteins in the bread!
Typical sourdough starter recipes
Most starters require 7 days of feeding with the expectation that over time the starter will create more and more yeast and then be more and more bubbly because of that.
However, time and time again I've seen gluten-free starters peak at day 1 or 2 and then slowly lose their bubbly activity with every feeding.
This could be because I'm doing it wrong, or because it is really hard to get a gluten-free starter to work perfectly. Either way, if it works quicker with less feeding and waste, why not take advantage of that?
The 3 day GF starter
Because I've found that the starter works better after just a few days, I started leaning in.
If something can be done in 3 days with 2-3 cups of flour instead of 7 days with triple the flour, why not choose the quicker and more consistently successful approach?
It also helps reduce waste by reducing the number of discards and feedings required. And, I find I feel better when I'm not making starter discard recipes and bread multiple times throughout the week.
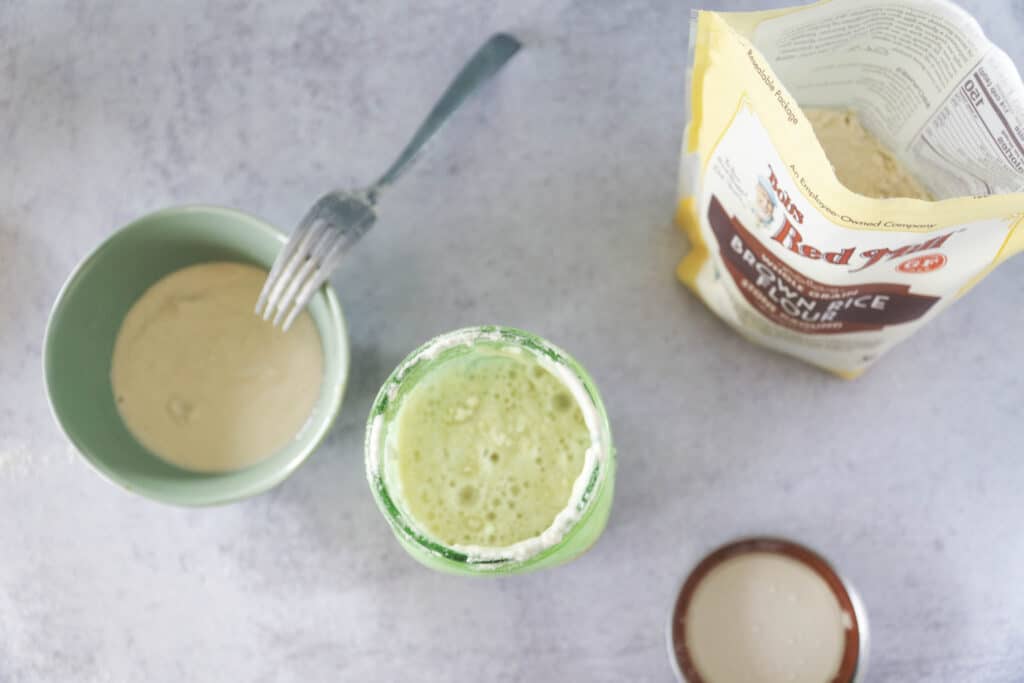
How to make the Gluten-Free Sourdough Starter without a scale!
The start is about mixing flour and water to culture the natural yeasts on the flour. First, you mix water and flour, then let it sit, and feed it.
Mixing the Flour and Water
The first part is to mix equal parts water and flour in a mason jar until it has the consistency of pancake batter. It should be thin enough to drip but thick enough to stick together and have drops maintain their shape for a few seconds.
1 Cup Bob's Red Mill Bown rice flour
1 Cup water
Choosing the right brown rice flour for your sourdough starter:
After trying millet, white rice, quinoa, and many different brands of brown rice flour there is only one that works best for this recipe: Bob's Red Mill Brown Rice Flour. I don't know why it works better than any other brown rice flour, but it does.
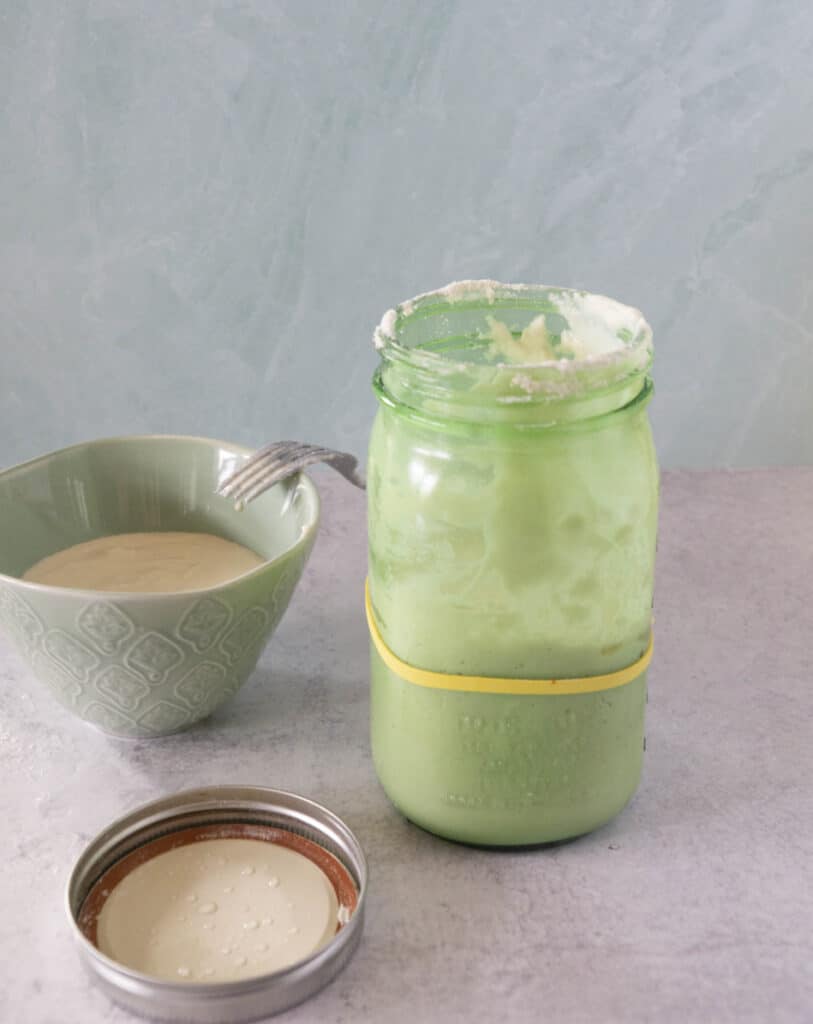
After mixing the flour and water together in the large mason jar, mark the height of the starter with a rubber band or sharpie mark and cover the mason jar with a dish towel.
Set the mason jar on a table in a cool space and let it sit until the starter grows.
You can tell that the start grows by comparing the height of the starter to the rubber band marker on the mason jar. After first mixing the flour, this usually takes 36-48 hours but it may take more or less time in our specific micro-climate.
When to feed the sourdough starter
The time to feed a starter is when it is hungry. You can tell that the starter is hungry because it will have grown to max height and then sunken back down. This is most easily seen through a smudge around the mason jar where the starter rose and then sunk back down.
You want to catch the starter after it's sunken back down.
How to feed the starter
First, you'll have to remove some of the starter and then you'll have to add more flour and water.
Steps to feed:
Mix the starter together - this will combine the bubbly part and some water that might have sunk to the bottom of the mason jar. This will reduce some of the volume
Remove about 1/2 cup of of the starter mixture and use for a discard recipe or compost
Add 1/2 cup flour and just under 1/2 cup water until the starter has that pancake batter consistency
Recover the mason jar with a dish towel, update the rubber band marker to the height of the starter, and let sit in a cool place until the starter grows
Fort his recipe, you only need to feed the starter once. You can feed it twice if you're not quite ready to make the bread yet or if the starter hasn't risen enough.
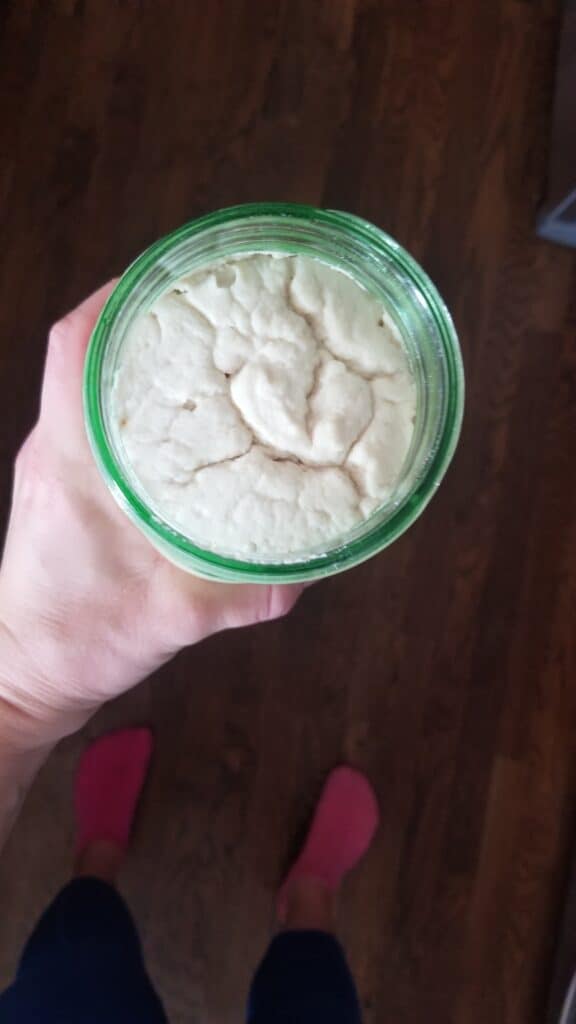
What you're looking for in a finished starter
The starter should grow until it doubles in size. It will have lots of bubbles and increase in size.
You can tell how much the starter has grown by placing a rubber band around a mason jar after feeding as a measurement of where the starter began. Over time, the starter will grow and you can use the starter to make recipes!
You want to use the starter at full activity to make bread, which means that you have to catch it when it is at it's highest before it shrinks down again.
How to use discarded starter that you aren't using to make the bread
There are lots of recipes for starter discard. You can use the discarded starter while you are feeding or if you have leftover after making bread. As I said, I don't find that gluten free starter works as well over time and so I tend to remake a new starter with every loaf.
My two favorite starter discard recipes right now are:
The key to making the sourdough bread is catching the starter at it's peak activity. That means before the starter starts to sink back down after doubling in size.
Making Gluten-Free Bread is easier than traditional sourdough!
Finally, something about being gluten free that's easier!
Unlike traditional wheat bread, gluten free sourdough does not need to be kneaded. In fact, you shouldn't knead it because that will push out all of the bubbles that give it structure.
In other words, with gluten free sourdough you simply mix the flours, add the starter and water, and let the dough rise on its own.
Here's what you'll need to do:
Mix the dry ingredients together
Add in starter and water
Put in a large bowl and let sit for 3-4 hours
Transfer to another large bowl or sourdough proofing basket or banneton and proof in the fridge for 7 hours or overnight
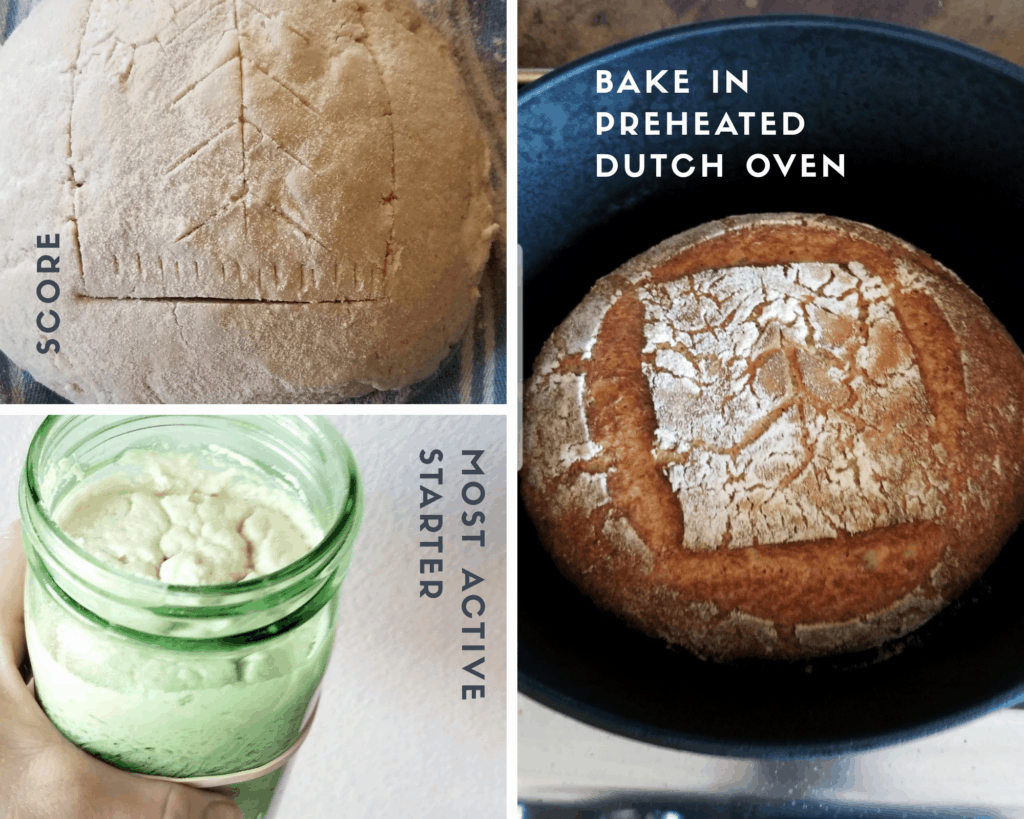
Preheat oven to 475 degrees with the dutch oven or boule pan in the oven so it is hot for cooking
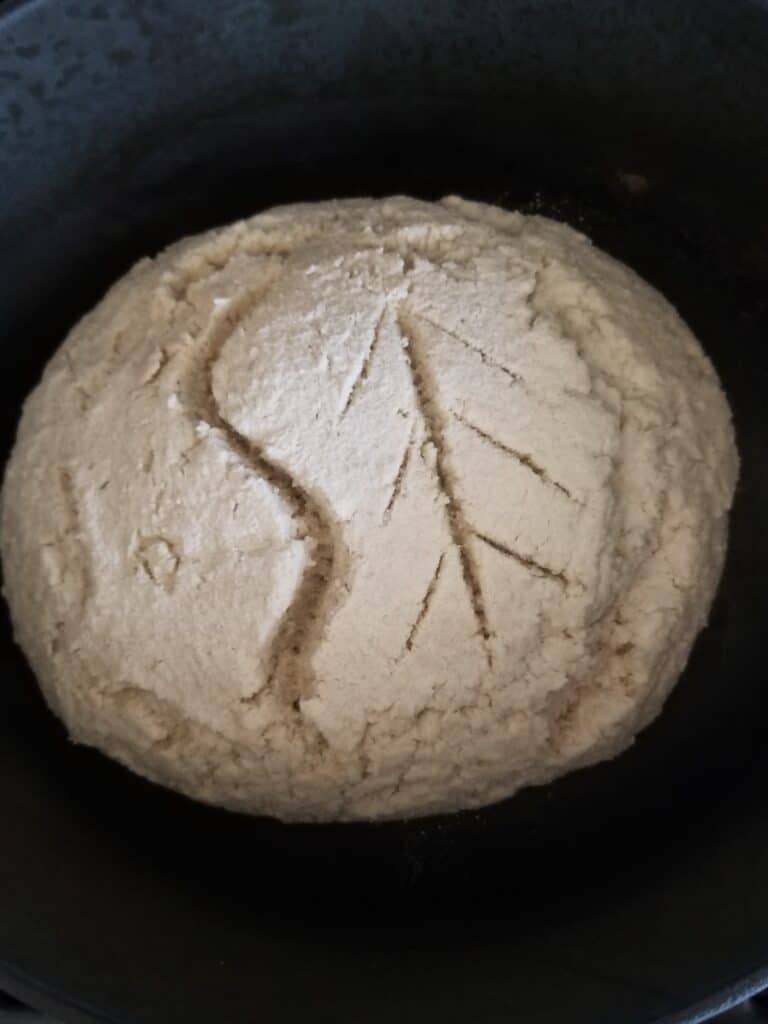
Flip the proofed sourdough loaf onto a dish towel, dust with rice flour, and score
Carefully place the scored loaf in the preheated dutch oven and bake covered for 50 minutes, uncovered for the last 10 minutes until browned.
Carefully remove from the dutch oven or boule pan and let cool before slicing and enjoying!
Scoring your Sourdough Boule Loaf
Someone once told me that in bread making, the score is the signature. So, get creative here!
You can see all sorts of designs with a quick google image search, but my personal favorite is to add a little tree.
The important thing, is that there are two types of scoring.
Thin score
This is decorative and can be larger. It will also stay in tact more than the other scores. To make this score, press a knife or scoring knife lightly into the boule in a pattern.
Thick scoring
This is to release the bubbles and will separate more! This should be a large incision into the loaf and will separate farther as the bread expands in the cooking process.
Traditional sourdough made completely gluten free with reduced starter feedings and no scale! Try homemade gluten free sourdough bread with this simple 3 day recipe
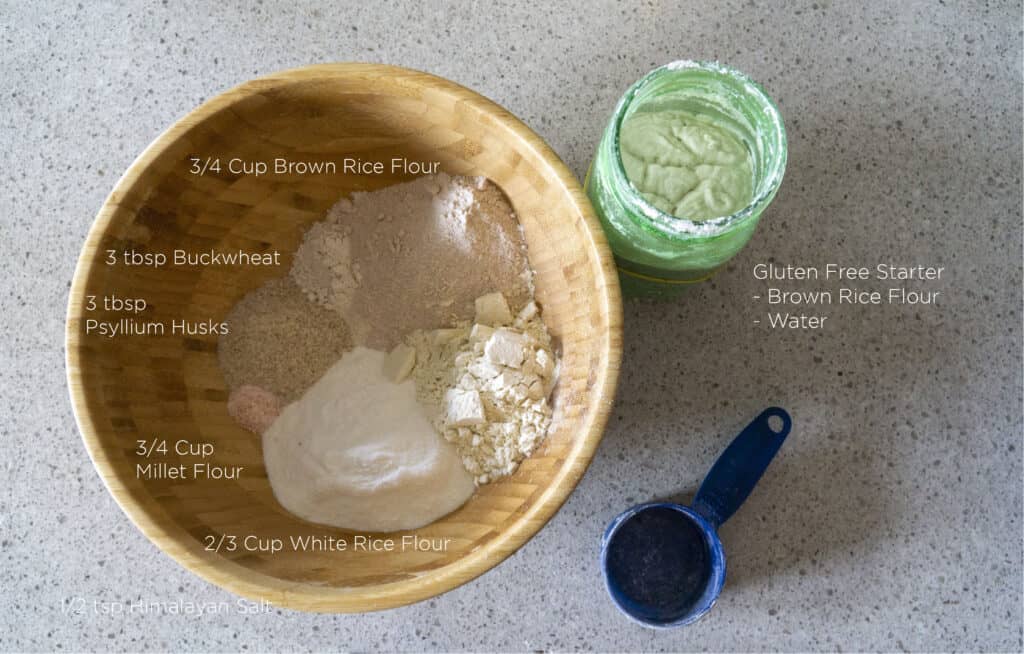
Ingredients
Starter
1cup Brown rice flour (Bob's Red Mill Organic)
1cup Water
Additional flour and water (1/2 cup each per feeding, 1-3 feedings)
Bread
1/2cup starter (overflowing, at full activity)
3/4cup brown rice flour
3/4cup millet flour
2/3cup white rice flour
3tbsp buckwheat
3tbsp psyllium husks
1/2tsp Himalayan sea salt
2cup water
Instructions
Create the Gluten Free Starter
1
Combine 1 cup brown rice flour and just under 1 cup of water until combined. Add water as needed until the mixture has the consistency of pancake batter.
2
Cover the jar with a dish cloth, put a rubber band or line with a sharpie on the mason jar to indicate starter height. Set aside in a cool dry place until the start grows and shrinks back down.
Feed the starter
3
Mix the hungry starter together - this will combine the bubbly part and some water that might have sunk to the bottom of the mason jar. This will reduce some of the volume
4
Remove about 1/2 cup of the starter mixture and use for a discard recipe or compost
5
Add 1/2 cup flour and just under 1/2 cup water until the starter has that pancake batter consistency
6
Recover the mason jar with a dish towel, update the rubber band marker to the height of the starter, and let sit in a cool place until it doubles
7
Repeat the feeding one more time if needed to get a doubling in size. Feedings should be 8-16 hours apart and based on the rising and sinking of the starter.
Baking the Bread
8
Mix the dry ingredients together
9
Add in starter and water
10
Put in a large wooden bowl and let sit for 3-4 hours covered with a damp dishcloth
11
Transfer the loaf to another large bowl or sourdough proofing basket or banneton and let sit covered in the fridge for 7-12 hours or overnight. This is proofing.
12
Preheat oven to 475 degrees with the dutch oven or boule pan in the oven so it is preheated for cooking
13
Flip the proofed sourdough loaf onto a dish towel, dust with rice flour, and score
14
Carefully place the scored loaf in the preheated dutch oven and bake covered for 50 minutes
15
Cook uncovered for an additional 10 minutes until browned.
16
Carefully remove from the dutch oven or boule pan and let cool before slicing and enjoying!
Nutrition Facts
Servings 1
Amount Per Serving
Calories133kcal
% Daily Value *
Total Fat1g2%
Saturated Fat0.2g1%
Sodium82mg4%
Potassium86mg3%
Total Carbohydrate28g10%
Dietary Fiber3g12%
Sugars0.3g
Protein3g6%
Calcium 12 mg
Iron 1 mg
* This nutrition information does not tell the whole story of food's nutritional value! Make sure to use your gut intuition on what your body needs, eat your veggies and get 30 plants a week for optimal gut health. This nutritional data is calculated based on the above values and standard brands. This information may vary. Percent Daily Values are based on a 2,000-calorie diet. Your daily value may be higher or lower depending on your calorie needs. Tried this Recipe? Tag me Today! Mention @EatYourWayClean or tag #EatYourWayClean!
Note
💭 Top tip
The best flour to create a rapid starter is old flour. Use older brown rice flour to get a rapid starter as I have done with this recipe
For breadmaking, use the starter at full activity aka highest poofiness. This is when it doubles in size and has not yet started to sink back down.
If at any point your starter does not have the right consistency, you can add a little more water or flour. The consistency is more important than the cup ratios.
You can adjust any of the flours to flours you prefer or have on hand.
Millet: Substitute with quinoa, amaranth, or other ancient seeds and grain.
Millet can be substituted for half tiger nut flour and half coconut flour
Can also use additional rice flour
White rice flour: can be substituted with brown rice flour and Amaranth, tapioca, or Cassava flour. Use a 3/4 to 1/4 ratio of the brown rice to starch.